Well, the time is here. After ten five three long years, the powder room is finally. done.
It is a GLORIOUS DAY people!! I’m seriously so excited to have this room complete, and I’m even more excited that I LOVE it so!
Let’s go back a little bit first, shall we? Pretty sure this room has been five colors now. I’ve never even shown you the before before, but here’s the before since I’ve been blogging:
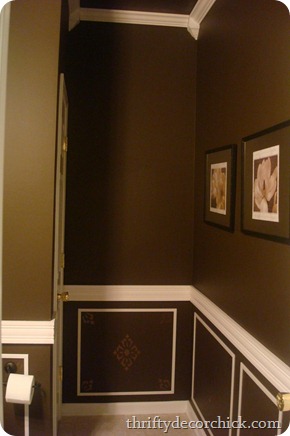
It was in my dramatic days. :) I had a love of all things chocolate brown.
I painted it years back but it was still a mess – holes in the walls, only one coat and the brown was popping through, and then I started the wall treatment forever ago and it sat like this for a while:

And then I got the planking done and things started to come together, but I think a lot of you thought I was losing it a little bit:

Did you see my vision? Or did you think I was losing my mind? Or creating a room that looks “a little bit like a barn” as my SWEET husband said?
Well, he finally sees what I had in my head…now. I admit it doesn’t always come together till the very end. Part of the reason this one took so long is I couldn’t decide on a final vision for it – I had a few ideas over the years but finally last year inspiration really hit, in the form of the Bub’s art:

The whole space was inspired by the beautiful colors in this art – at first I was going to paint the walls a bright red, (as you can see above), but I realized quickly that it was going to be too much.
Instead I went neutral but that’s allowed me to really have fun with color in this space:

By powder room standards this is a big one. Don’t I know it.
Painting all those wood planks made me want to poke my eyes out:
 The end result was SO worth it though.
Would I do it again?
It may be too soon to ask. ;)
It’s hard to get good shots of this room with my normal lens so I used a wide angle and it made parts of the photos blurry, sorry about that. But I wanted you to be able to see it as I do (without my contacts in, obviously): 
The room also took a while because I decided last year to continue the wood floors into the room, but waited until it fit in the budget (it ended up costing $300) and the timing worked – we had to pull everything out of the room to have them done:

We went without a toilet for a couple weeks and without a sink for a couple months. A fully functioning bathroom is highly underrated. ;)
I adore the dark floors in there. They really warm up the room, especially against all that white trim. Gah. My favorite! I got that rug from Target about a year ago, maybe two? It’s been a while. I loved the colors in it, and when I realized how well the Bub’s artwork matched I knew my plan was meant to be!
It’s also hard to take pics of this room because there’s so little natural light. So bear with me on these! Here’s a good shot of all of the planking that went on in here:
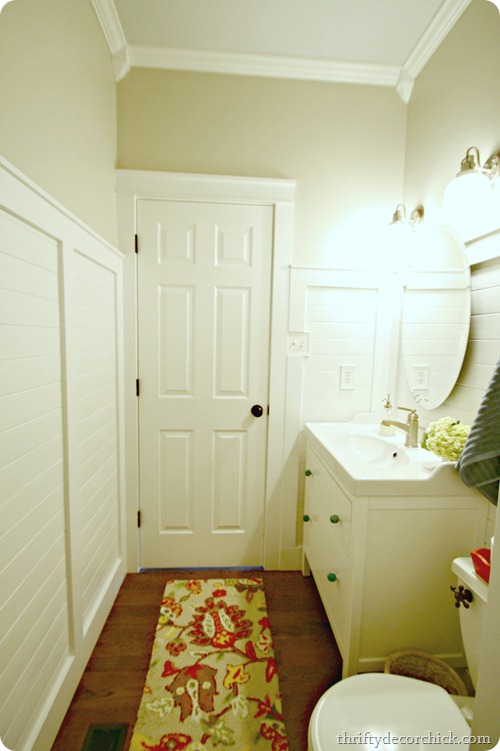
Remember when I showed you the process and mentioned that I didn’t worry about the seams and lines of the wood planks matching up? Well, the board and batten trim I put over everything is the reason why:

The wood planking I used only came in eight foot lengths, so I knew I’d have to cut them down on that long wall. The b and b look was perfect for hiding all that not-so-good stuff! It’s SO not perfect people, it never is!
You can see a good shot of the wall treatment and the new trim around the doors here:

I’m SO glad I decided to rip out the trim and redo those doors!
Here’s the linen closet door with it’s craftsman trim:

It makes such a difference!! Luscious.
We used to have a pedestal sink in this bathroom:

And I loved the faucet but the sink was not my favorite. I did like it when we moved in because it was different than a regular vanity that I was used to. But eventually I missed having some storage.
So we went with the IKEA bathroom vanity instead – the only major purchase for this room (other than the floors):

The vanity and sink together came in under $300. I shopped all over the place and still found that to be the best deal for the size. I LOVE the sink – it’s so nice to have room for the soap dispenser!
I’ll blog about that whole piece more soon:

The lights are one of my favorite parts of the room – I found them at Home Depot and just thought they were so different. Kind of vintagey, I love them!:

They also match the new faucet perfectly – couldn’t have worked any better!
You can see in this old pic that we used to have one light fixture above the sink:

I always wanted to do two separate lights, I just love that look!
So that we did:

It brought the light down almost a foot and I just like the lighting better this way in here.
You can see in this area how I mixed blues and reds in the room – again pulling from the art and the rug. It’s a combo you wouldn’t think would work just talking about it, but I LOVE how fresh and pretty it is against the white! I think they work great together!
The blue is more of an aqua blue, but I also used a little true aqua in here too – in the knobs I told you about here and the vase on the vanity:

It’s really a candle holder but I think it works even better as a vase. ;)
The towel is that darker blue and the stuff near the toilet pulls in more of the red:

I meant to put those lights on a dimmer before I took pics, but it hasn’t happened yet. I’m not touching this room again for awhile! Girl needs a break.
You may recognize the boat oar from my last post. ;) It got a little redo and I stinkin’ love it:
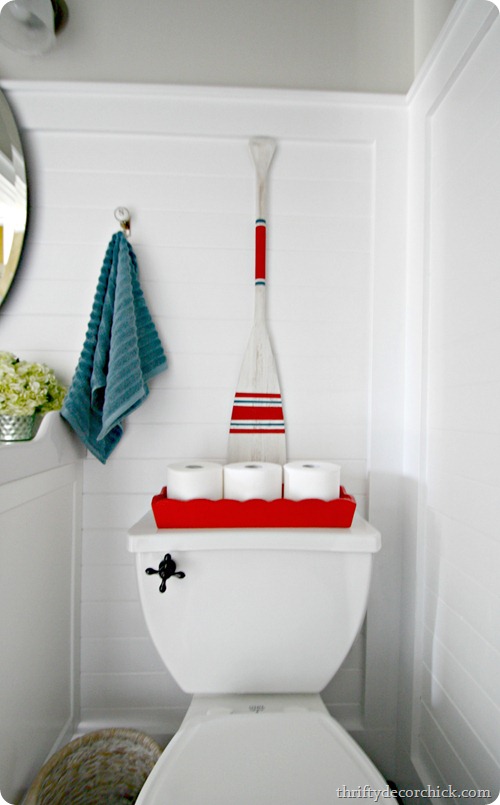
So that area about the toilet is hard, don’t you think? I struggle with what to do there – a starburst mirror would be pretty but I already have one mirror on that wall, and do people really want a mirror there? Uh. No.
I almost hung shelves there to fill and decorate, but in the end I wanted it to be simple – I didn’t want a lot of stuff in there. The oar was a perfect fit and it totally makes me smile when I see it. :) (Although I may hang it higher since the toilet paper blocks some of it.)
I really, really adore how it all came together (and I better!!) – it’s so fresh and fun and I really couldn’t be happier. It was a TON of work, not gonna lie. Those planked walls…the installation really isn’t bad, it’s the painting. If I was smart I would have installed it all and then sprayed it before the floors were put in. But oh well…live and learn. I survived. :)
Here’s a before and after shot – the dark brown we had for years and the light, bright and colorful version we have today:

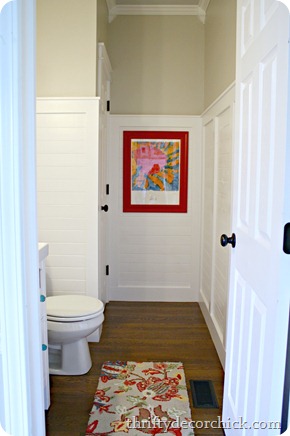
The total cost was about $1000 for the whole room, which I didn’t think was too bad considering we have hardwoods in there and a new vanity, sink, mirror, faucet, light fixtures and new walls. Oh and that was spread out over a span of about a year, so that helped too.
That’s why I take forever to do all my spaces, don'tcha know? To spread out the costs. ;) (That kind of is true actually. That and I just take forever.)
Anyway, here’s a source list for many of the items and I’ll follow up with more detail on the sink and vanity!
Rug – Target a couple years ago
Frame – Goodwill
Oar – thrift sale
TP holder – HomeGoods last year (I painted it) I just saw some more last week!
Light fixtures – Home Depot
Vanity, sink – IKEA
Faucet – Lowe’s
Mirror – Home Depot
Wood for walls – Lowe’s (see here for how to)
Any other questions? Let me know and I’ll answer them! I did a little happy jig yesterday because this room is finished and I love how it turned out. Can you believe IT’S FINALLY DONE? Sorry for yelling but IT’S FINALLY DONE!!!
Holler.





